Reply With Quote
little blurry pic but good looking jig. i see you bought you a bass pro starter kit.

 Likes: 0
 Thanks: 0
 HaHa: 0
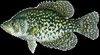
 Crappie Wall Hanger

All,
I have been playing w/ some jigs for the next swap - trying a few differant things....
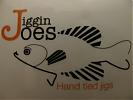
I've enclosed a pic of a proto-type I did this morning - the pic is a bit blurry (my camera doesn't have a macro setting - got a bit to close) - and the head (1/16 oz, #4) is un-painted (didn't have any w/ paint) - but I wanted to get a idea of what this would look like.
The tail is white hackle, black chennile, the legs are a single strand of silcon from a spinner bait skirt (black - what I had on hand) - cut up in to smaller sections.
This is somewhat based on a jig Fowlmood posted about 2 weeks back, and on a series of PM's I've been trading w/ Flatfish.
Not entirely happy w/ how it turned out - yet....
Some things that I think could improve it:
White silicon legs vs the black.
White marabou and white silicon.
Head: Am thinking of following colors (single) - red, blaze orange, white or black.
UG
Crappie.com 1K Star General
little blurry pic but good looking jig. i see you bought you a bass pro starter kit.
Crappie Wall Hanger
SLJ -
Starter kit came from Gander Mtn - outdoors chain store up here in the frozen tundra - but I'd guess these kits are pretty uniform in contents.....
I will see if I can get some better pics over the weekend.
UG
Trophy King II
Looks good UG. Those are my two favorite colors.
There's nothing like feeling that THUMP...FISH ON
Crappie.com 1K Star General
UG... i've got some real similar to that.... i'll need to take a pic and post it... if i remember correctly, the color pattern that was most successful for me what a chartreuse head, purple chenille body with lime green legs, and white hackle for the tail.
Sometimes the legs can be a hassle but here's some tricks to try when you want a different effect:
Laid back - this makes the legs look like they are laying back against the body as if the bug was swimming in "cruise" mode. After laying down the thread base and tying on the hackle, take one leg (leave 'em a bit long and trim when done, makes it easier to handle!) and angle it across the hook shank and toss on some wraps. Take the other legs and lay it cross-ways on the first leg and toss on a couple of wraps. Now run the thread in front of the legs and pull both legs back and start building up a head; be sure to pull a couple of wraps slightly on top of the front of the legs. You can let go and you will see they are laying somewhat back. Now tie on the chenille body and wrap up to the head. When you get to the legs make sure the chenille butts up against the back of the legs and then pull the legs back as you wrap the chenille up to the head. The chenille will cause the legs to lay back a little further.
Wide open - this wrap technique really makes the legs stay apart like a bug on top of the water would do to stay afloat. After your thread base and hackle are on, lay a leg cross-ways on the hook shank and toss on a couple of wraps and then lay the other leg on and run a couple of wraps in the opposite direction (the thread wraps on the legs should look like an "X")... now in the middle you're gonna want to run several tight wraps right between the front and back set of legs. This bump will really separate the legs but don't do too many wraps! Now put on the chenille and start wrapping up to the head. When you get to the legs you'll want to make sure the chenille butts up against the back of the back legs, then up in between the legs and then against the front of the front legs before finishing off at the head.
Hope these have given you some ideas on different ways to do those legs!!
Crappie.com 1K Star General
Thats the way I did mine, and it turned out great.
Crappie Wall Hanger
Alan
Wide open is what I was after, but I laid them (legs), cross ways - like a +, vs an x.
Back at it tonight....
UG
Crappie.com 1K Star General
* Crappie.com Supporter * Member Sponsor
Looks good UG bet it will catch some fishes.
Crappie Wall Hanger II
* Crappie.com Supporter * Member Sponsor
next time im in rochester you can let me test it for ya
Joe
Crappie.com Legend
That'll work!! Keep trying and tying
Fatman
Posting Permissions