


THANKS SKIP! Right now I'm in crank bait mode,but when i start back tying this fall I WILL make some for myself.
thanks again for sharing

 Thanks: 0
 HaHa: 0
 Super Moderator

 Okay Guys, Here is How to Make Skip's Glow Jigs
Okay Photobucket ruined this post due to it's change in picture sharing and I have not changed all these pictures out yet and may later on.
How to make Glow Jigs and Flies.....
Materials needed....
Softex Maybe even more than one? (You should check prices all over for this)
Wooden Skewers (I am still using the first skewers I started with and just wipe them off after each use)
Clear Powder Paint
Glow Powder (Best quality you can find)
White Ultra chenille (maybe more than one size)
Starting out you may need a few extra glass jars to keep this all in.
Basic steps.....
Paint head
Tie Jig Just like any other jig you would tie except use the Ultra Chenille! Of course depending on the size of what your tying select the best size of Ultra Chenille that you can. Unless your tying really tiny jigs or flies you may not need the micro size chenille.
Okay first the glow head. You will need some Clear Powder Paint and some Glow Powder. Mix 18% at most of the Glow Powder to the Clear Powder Paint. Once painted I do cure it just like any other jig head. Then after that is done I do add one coat of Sally Henson’s Hard as Nails over that to make it feel more smooth because the Glow Powder makes it feel rough.
Next you will need Softex and mix in enough Glow Powder that it’s no longer clear. I don’t have a % to tell you and I just do this by feel and sight. I use a wooden skewer like your wife may use in the kitchen and I use the pointed end to apply the mix to the chenille tied on the jig. As you turn the jig around you can put the mix on and smooth it out (put on a bit thick as some will soak in) and once your happy with it, hang on something until dry enough to handle easy. Then after it’s dry or at least done enough, get some Clear Softex and again use the skewer to put a coat on over the previous mix coat. This final coat will make it feel smooth where before that it feels pretty rough. Also a note, if your using new Softex it may take 2 coats of the clear over the body to make really smooth with drying between coats. However after a while and you have a jar of thicker stuff it will do well with just one coat.
Here is where I buy my Glow Powder or did when I was still buying it. Now I have plenty, probably too much, LOL! There are other places but I say buy at your own risk on that! Sometimes you can catch it on sale and that is when you want to load up on a nice size package.
Also they seem to come out with what is suppose to be a new Green that is brighter, I have several different ones and really can’t tell much difference so just use what you have before buying more and I feel sure they have made some since I bought any.
Glow in the Dark
and for the page you really want at this site...
Glow in the Dark Powder
Now some Pics.
This is the jig tied and also showing my largest Ultra Chenille. The chenille can also be used to make it glow and maybe even use it for an extended tail.
Here I have added the mixed Glow to the body and has dried.
Here I have added the thick clear top coat and it's still wet.
Here the Clear top coat has dried and it's finished.
Now some Pics of materials:
Here is the mixed Glow Powder and Softex and what it looks like when I use it.
Here is the mixed stuff Glowing
Here is my thick Softex which is what it gets to over time using it and it can be used in lots of ways other than Glow Baits.
Here it is in new condition and thin and also lots of ways to use this as is!
Here is a 4 Oz pack of Glow Powder.
Powder Glowing in package.
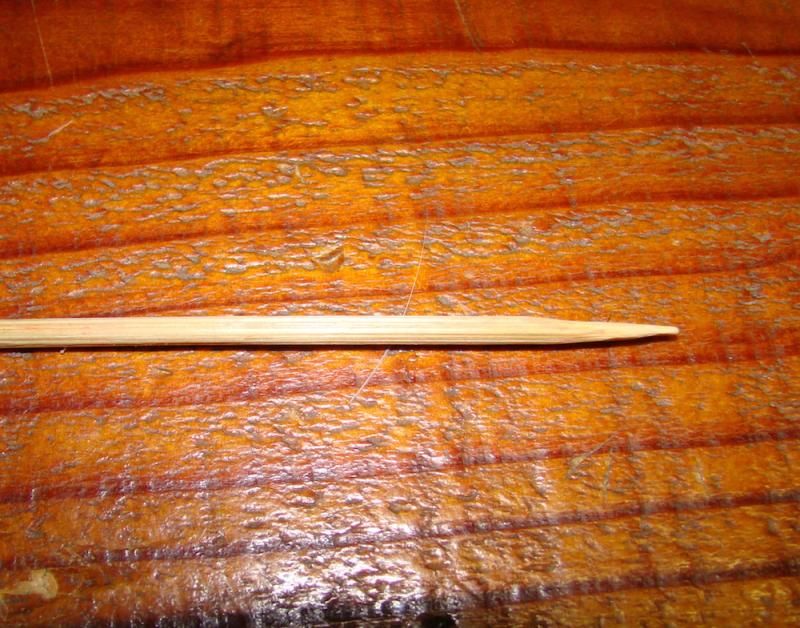
Last here is one of my wooden skewers I use.
Last edited by skiptomylu; 10-19-2017 at 08:45 AM.
Peak Vise Dealer
Tying Materials, Chenille and Hackle
For Pictures of my Crystal, Nylon/Rayon or
New Age Chenille Please PM Me! Also I
have the Saltwater Neck Hackle and some
colors of Marabou plus other things!theygotaeat, Yodibuzz, RetiredRR, BoarBuster, USMC_7222, cruisor, snake River, darcie1, shipahoy41, wvfishing LIKED above post
 Crappie.com 1K Star General
THANKS SKIP! Right now I'm in crank bait mode,but when i start back tying this fall I WILL make some for myself.
thanks again for sharing
Trophy King II
 Crappie.com 2010 Man of the Year
* Member Sponsor
Crappie.com 2010 Man of the Year
* Member Sponsor
wow skip this is a very complex jig . you put a lot of time and effort into building one I for one won't even try to build one they are very complex and time-consuming but I congratulate you skip on sharing one of your top secrets with everyone.
bob.
Super Moderator
Thanks guys and your welcome. Guess more people will understand why I use to charge $1.50 each for them. Not sure I would still do them for that actually. Snake yes your right, they take time and you can't rush applying the stuff or the drying after and then the clear and dying and finally done if happy with it, LOL!
Peak Vise Dealer
Tying Materials, Chenille and Hackle
For Pictures of my Crystal, Nylon/Rayon or
New Age Chenille Please PM Me! Also I
have the Saltwater Neck Hackle and some
colors of Marabou plus other things!
Crappie.com 3K Star General
Crappie.com 2K Star General
Really cool skip thank you for sharing... After I get my garage set up I might be able to get a little tying in and try this
Trophy King II
Thanks Skip, Don't know if I'll ever make any up, but it's nice to know how! Thanks again!
 Crappie.com 1K Star General
 Crappie.com Legend - 2022 Crappie.com Man of the Year
They do take a lot of time and patience Skip but they are well worth it. I really like the way you presented this lesson. Some of it i learned by experimenting with the tips you gave me seven years ago. You did a fine job of explaining the process my friend.Originally Posted by skiptomylu

Aquatic Species Removal Engineer.
May God be with you. Keep CALM and STAY ANCHORED with your faith.
















 Romans 5:8